Understanding Metal Artwork Requirements
Clear, accurate artwork is the foundation of every well-made metal product. Whether you need medals, coins, nameplates, or branded accessories, the path starts with clear metal artwork requirements. Getting these right saves production time, cuts costs, and ensures your finished pieces meet expectations—every detail matters.
Types of Artwork Accepted for Metal Manufacturing

Most metal manufacturers accept artwork in vector or high-resolution raster formats. Vector files (like AI, EPS, or SVG) allow engineers to scale your design without losing sharpness. Raster files (like PSD, TIFF, or high-res PNG) must be at least 300 dpi at final size to ensure crisp results. For custom products, wireframe or layered files reveal how raised and recessed areas align, which is essential for the production process.
Why Vector Files Are Preferred
Vector files are built from geometric shapes, not pixels. This lets technical teams create precise molds or dies for processes like die casting, stamping, or etching. If you need help converting a logo, most manufacturers offer these services upfront. For best results, submit artwork with clear color separations and simple outlines.
Key File Types Compared
| File Type | Best For | Scalability | Common Uses |
|---|---|---|---|
| AI (Adobe Illustrator) | Logos, detailed outlines | Unlimited | Die making, engraving |
| EPS | Simple/vector shapes | Unlimited | Laser cutting, stamping |
| Layered project files | High | Multiple process CADs | |
| TIFF/Raster | Halftone photo effect | Fixed (resolution limits) | Photo-etching, some print methods |
| DXF/DWG | Engineering | Unlimited | CNC, wire EDM |
What Not to Submit
- Low-res JPEGs, screenshots, or web images
- Photoshop files under 300 dpi at full size
- Designs with hidden layers or unclear references
Preparing Your Design: Key Steps
A clean submission process starts with these core steps. The more detail you provide up front, the smoother prototyping and mass production will go.
Step 1: Choose the Right Size and Shape
- Specify finished size in millimeters or inches. Most medals are 50–70mm, badges 20–40mm, coins 30–45mm.
- Outline shape (round, square, custom) in your vector file. Complex outlines may affect die-making and require smaller runs.
Step 2: Indicate 2D vs. 3D Relief
Metal art can be flat (2D) or sculpted (3D relief). For 3D, supply side profiles or layers. Your vendor may create a 3D model for customer review before tooling starts.
Step 3: Color Breakdown and Separation
- Use solid spot colors and name each swatch (with Pantone numbers if possible).
- Show where to apply which finish—matte, polished, sandblasted, etc.—on your working file.
- Use distinct outlines to separate raised metal, enamel/no enamel, and different colors.
Metal Artwork Requirements
Meeting metal artwork requirements is crucial for a successful project. Follow precise guidelines to avoid miscommunication and costly revisions.
Minimum Line Width and Relief Depth
- Raised metal lines: typically at least 0.2–0.3 mm wide.
- Etched or debossed lines: at least 0.15 mm wide, 0.2–0.4 mm deep.
- Soft enamel color pools: minimum 0.3 mm depth for best color fill.
Text Legibility and Scaling
- Choose sans-serif fonts for text under 3 mm tall.
- Keep letters bold; width should not drop below 0.2 mm at any point.
- Maintain a 0.3 mm gap between raised and recessed areas.
File Organization and Notes
Label layers clearly (e.g., “Raised Metal,” “Enamel Color 1”). Attach a separate PDF for callouts and finish requirements if not included in the design file. This helps the engineering team avoid guesswork and deliver accurate samples.
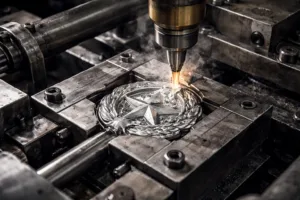
From Artwork to Tooling: The Manufacturer’s Perspective
Once you submit files, the manufacturer (like Gairun) reviews your artwork for technical fit. This process checks outline clarity, fill separation, and sizes against tool and mold limits. For fine 3D relief, technicians adjust depths in CAD, simulating how light and shadow will look in real life. This preview ensures your branding conveys quality and detail before metal is cut.
Typical Tooling Adjustments
- Eliminating undercuts that traps molds
- Adding minimum draft angles for smooth demolding
- Enhancing edge smoothness for safe handling
Material Choice and Its Impact on Artwork Preparation
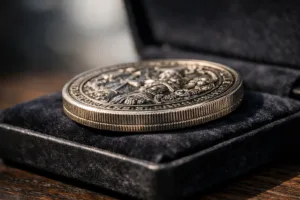
The material you select shapes the artwork requirements and finished look. For medals and coins, zinc alloy and brass handle complex relief well and support rich finishes. Stainless steel or aluminum is best for nameplates, furniture labels, and gifts needing corrosion resistance. Thicker pieces (over 3 mm) allow for deeper relief and weight; thinner ones work for labels or budget events.
| Material | Best For | Relief Depth | Finish Options |
|---|---|---|---|
| Zinc Alloy | 3D medals, custom coins | 0.4–2 mm | Antique, plating, enamel |
| Brass | Badges, mementos | 0.2–1 mm | Gold, nickel, dual color |
| Stainless Steel (304/316) | Nameplates, gifts | 0.05–0.5 mm (etched) | Etched, brushed, color in-fill |
| Aluminum (6061/5052) | Labels, promo tags | 0.1–0.4 mm | Anodized, painted |
Material Sourcing for Consistency
Suppliers like Gairun use tested sources for raw metals and run compliance checks (RoHS, REACH) to ensure products are safe for promotions and wearables. Ask to see certifications for special applications, such as children’s medals or jewelry.
Special Finishes and Their Artwork Implications
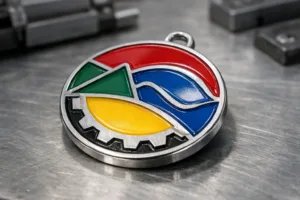
Choosing the right finish means designing with that look in mind. For matte, sandblasted, or antique finishes, avoid tiny raised areas that might look muddy. High-gloss chrome or gold plating needs even surfaces; brush effects require long, straight lines for a uniform look. For colored finishes (soft/hard enamel, anodizing, powder coating), mark each zone by finish type and break lines clearly.

Popular Finish Types
- Antique (brass, bronze, copper) – adds depth and age to club coins and medals.
- Electroplating (nickel, gold, gunmetal) – provides durability for everyday wear.
- Anodizing (aluminum) – used for colored tags and decorative hardware.
- PVD (Physical Vapor Deposition) – offers premium, scratch-resistant color layers.
Testing and Quality Control
Modern plants use tests like ASTM D3359 for adhesion, ASTM B117 for salt spray/anti-corrosion, and EN 1811 for nickel release on wearable items. Ask your manufacturer about their quality checks and request test data for critical projects.
Color Management in Metal Artwork
Precise color matching matters for branded products. Always cite Pantone numbers or RAL codes. Request test swatches if your project uses exact shades. For stained or transparent enamel, set a color density in your notes—different metal bases affect the final shade. Review guidelines with your supplier for flat, glitter, or glow-in-the-dark enamel.
Pantone Matching Best Practices
Expert Tip: “Upload artwork files with outlined text and all swatches named. Share color chips during sampling so both parties use the same reference in production.”
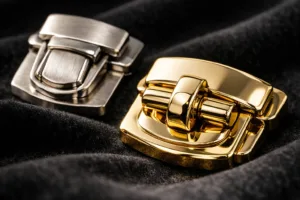
Mounting, Assembly, and Packaging Artwork Calls
If your product requires mounting points—like holes for keychains, posts for badges, or adhesive backing—show these as separate layers or callouts in your artwork. Use dimensions, not just visual marks, to avoid errors. For packaging (such as OPP bags, velvet boxes, cards), show window cutouts or label placement so branding aligns during final inspection.
Common Assembly and Mounting Types
- Split rings and lobster clasps (keychains)
- Butterfly clutches or magnetic backs (badges)
- 3M VHB adhesive, rivets, or posts (labels/nameplates)
Proofing and Pre-Production: Final Checklist
Before tools are cut or metal is cast, a proofing phase ensures everything is correct. Review rendered 2D or 3D previews from the factory. Confirm relief depth, color fill, metal finishes, and mounting locations. Many suppliers (including Gairun) provide digital proofs or pre-production samples for signoff. Expect this stage to take 2–10 days, depending on complexity and order batch size.
How to Speed Up Sampling
- Reply quickly to technical questions.
- Provide a feedback list on each proof—mark changes directly on images if possible.
- Bundle all artwork corrections at once to avoid delays.
Common Artwork Problems and How to Avoid Them

Mistakes at the artwork stage slow production and add cost. Watch out for these frequent issues:
- Illegible text or muddy details (too small or close together)
- Overlapping fills without clear separation lines
- Poor scaling of raster files leading to pixelation
- Missing or ambiguous dimension labels on technical drawings
- No callouts for critical finishes, textures, or mounting
Review your files with a fresh set of eyes. Ask your manufacturer to flag inconsistencies before final signoff. Running a small test batch or pre-production sample helps surface problems early, keeping your project on schedule.
Frequently Asked Questions
What file format should I use for metal artwork?
Vector files (such as AI, EPS, or SVG) are best for most metal manufacturing because they ensure sharp lines at any size and production stage.
How detailed can my design be?
Details should be no smaller than 0.2 mm for raised areas and 0.3 mm for enamel color pools to ensure visibility and durability in the final product.
What is a proof in metal manufacturing?
A proof is a digital or physical sample of your design showing the actual relief, finishes, and colors, used for approval before final production.
How do I specify custom finishes?
Label each finish area in your artwork and include a note or PDF listing the required electroplating, enamel, or brushed effects with reference samples if possible.
What is the typical lead time from artwork to mass production?
Lead time varies by complexity and order size, but sampling takes 2–10 days and production usually adds 2–4 weeks; rush orders may be possible.
How can I ensure compliance for promotional or wearable items?
Request official compliance certificates such as RoHS, REACH, or EN 1811 from your supplier, especially for items used in events or worn on skin.