
An effective Custom Lapel Pins and Badges specification does not begin with artwork size alone. It connects the visible silhouette, artwork detail, finished construction, likely mass distribution, and rear attachment layout. That is the central principle of this enamel pin size guide.
For a compact corporate logo, one central post may be an initial direction. An elongated character, top-heavy badge, or irregular collectible may need two separated posts. These are starting decisions, not performance guarantees. The final result depends on the approved geometry, material, backing, fabric, and wear validation.
Choose Enamel Pin Size and Post Placement as One Design Decision
Start with four inputs: where the pin will be worn, which artwork details must remain visible, what front silhouette is acceptable, and where the finished mass is likely to sit. These inputs should be discussed together before fixing enamel pin dimensions.
Define the worn orientation first. A vertical shield, horizontal wordmark, tilted character, and irregular outline place different demands on the rear support. For an irregular design, use the largest overall dimension as the main lapel pin size callout. Add width and height when both measurements are needed to describe the silhouette accurately.
Dimensions, thickness direction, relief, cutouts, decoration, base-metal direction, and attachment layout are connected construction decisions. A balanced front can still rotate or droop if the posts do not support the worn mass distribution.
Example 1: A compact, broadly balanced logo with a few color fields may initially suit one post in a stable central zone and a butterfly clutch or rubber clutch. The garment thickness, clutch selection, and finished construction could change that direction.
Example 2: A 45 mm vertical character with a wide upper section, a long lower extension, or layered relief may initially suit two separated posts. The final post positions depend on the actual center of gravity, rear clearance, backing choice, and wear test.
Gairun manufactures enamel pins, die-struck badges, zinc-alloy die-cast pins, photo-etched designs, and printed metal badges. These routes are not interchangeable. Artwork, surface appearance, shape, relief, text, color layout, and attachment determine which construction direction should be assessed.
Before tooling, an engineering check may cover dimensions, thickness, relief, metal borders, color areas, attachments, component positions, and the proposed production method. The exact checklist depends on the design structure.
Compare Enamel Pin Dimensions by Wearing Scenario
The following ranges are scenario guidance for common B2B applications, not a universal enamel pin standard. They help buyers frame a first discussion. Artwork scale, garment conditions, material, weight, and attachment still require confirmation.
| Buyer scenario and observable inputs | Contextual dimensions and base thickness | Artwork or construction implication | Initial attachment direction | Confirm before production |
|---|---|---|---|---|
| Corporate logo lapel badge; compact, regular logo for business wear | 18–30 mm maximum dimension; 1.2–2 mm base thickness | Clear lines and a controlled silhouette may suit brass or iron; complex irregular or dimensional forms may require zinc-alloy assessment | Butterfly clutch, rubber clutch, or tie-tack style attachment | Logo source file, thickness, clutch, color references, fabric, and packaging |
| Membership badge; regular outline with tier or color differentiation | 20–35 mm maximum dimension; 1.2–2 mm base thickness | Consistent outlines can support repeat variants; age group may affect the attachment direction | Butterfly clutch, rubber clutch, or safety pin | Age group, tier system, dimensions, attachment, colors, and annual variant plan |
| Uniform or role badge; clear identification for longer wear | 25–45 mm maximum dimension; 1.5–2.5 mm base thickness | Fabric thickness, badge weight, worn orientation, and rear flatness influence stability | Double-pin butterfly clutches, screw posts, or magnetic backs | Fabric thickness, orientation, backing, weight, finish, and retention testing |
| Fashion, art, character, or brand pin; irregular outline, cutouts, layers, or effects | 20–50 mm maximum dimension; 1.5–3 mm base thickness | Open areas and layered relief can shift mass distribution; zinc alloy may suit formed outlines or dimensional bodies | Rubber clutch or double rubber clutch | Authorized artwork where applicable, thickness, post positions, effects, backing, and backing-card packaging |
| Official or formal institutional badge; detailed insignia, relief, or numbering | 30–60 mm maximum dimension; 1.8–3 mm base thickness | Relief hierarchy, numbering, formal surface treatment, and authorization need coordinated handling | Screw posts, double pins, or brooch-style attachments | Authorization, dimensions, attachment, numbering, surface treatment, and presentation packaging |
| Printed tinplate event badge; broad graphic for event identification | 45–75 mm finished badge direction; thin shell construction | Keep separate from metal enamel pin guidance because the shell and assembled profile are different | Safety pin or clip-and-pin combination | Printed file, bleed, coating, pin direction, total thickness, and wear test |
For compact regular logo badges, brass is a scenario material direction, with iron and zinc alloy as alternatives. For collectible pins with irregular bodies, cutouts, layers, or dimensional relief, zinc alloy may need assessment alongside the silhouette, thickness, rear attachment area, and decoration plan.
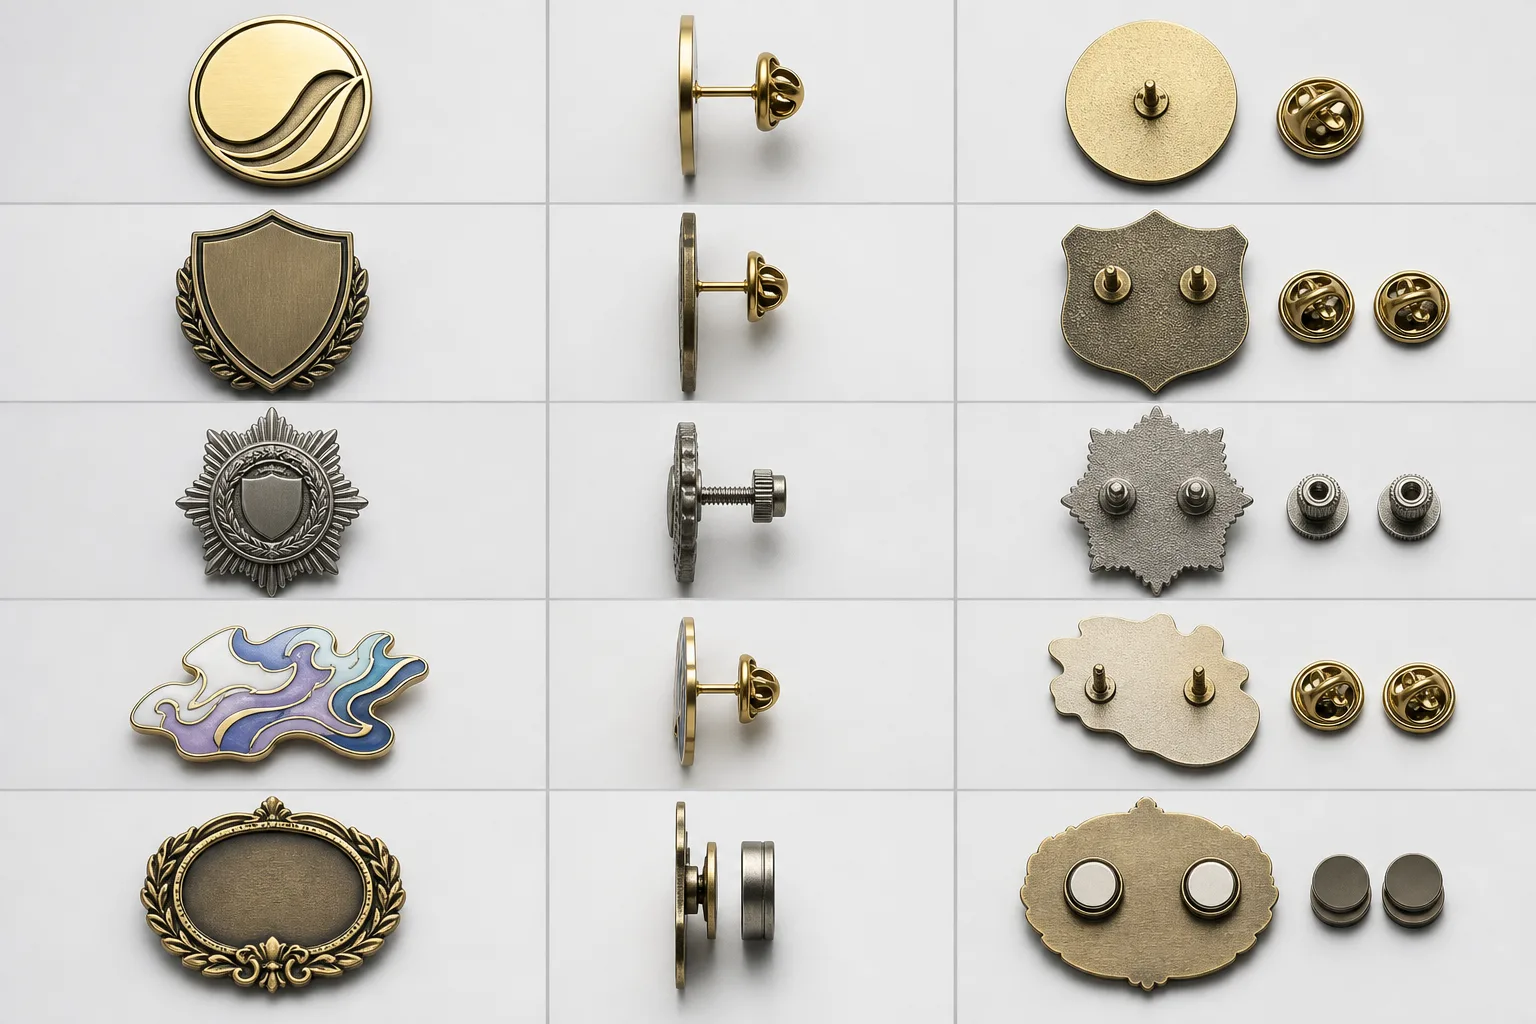
Check Artwork at Actual Lapel Pin Size Before Selecting Construction
Inspect the artwork at the intended 1:1 lapel pin size and in its worn orientation. Check small lettering, narrow gaps, internal outlines, color divisions, cutouts, and pointed outer features. A design that looks clear on a monitor may need simplification or a larger front silhouette.
Soft enamel leaves colored areas recessed below raised metal borders. The artwork therefore needs clear metal boundaries between color fields. Imitation hard enamel brings color and metal areas closer to one level, but it still needs controlled color areas and defined metal borders.
Screen printing can be considered when graphic detail should remain printed on a prepared metal surface rather than divided into enamel cells. UV printing can be considered for printed detail or multiple tones. Fine marks, gradients, and color layout should be checked for the specific design rather than treated as automatically reproducible.
Die-struck construction fits designs where stamped raised and recessed metal areas carry the visual hierarchy. Zinc-alloy die-casting can be assessed for formed outlines, irregular bodies, or more dimensional relief. Gairun can begin from vector artwork, a usable PDF, or a hand-drawn concept, but the supplied file is not automatically production-ready.
Example 1: A 20–30 mm regular logo with three broad color fields may initially suit a stamped enamel-oriented badge. Very narrow internal lines, small text, or crowded color boundaries could lead to artwork simplification, a larger size, or a printed decoration direction.
Example 2: An irregular character with a cutout, raised accessory, and gradient background may initially point toward zinc-alloy forming with UV printing or a combined decoration plan. The final choice could change after the rear post area, relief height, and color transitions are defined.
Tooling begins only after the relevant production artwork has been reviewed and accepted. Artwork acceptance creates a controlled visual reference; it does not approve commercial, packaging, testing, or shipment terms. For additional artwork preparation guidance, see Gairun’s Buyer Resources.
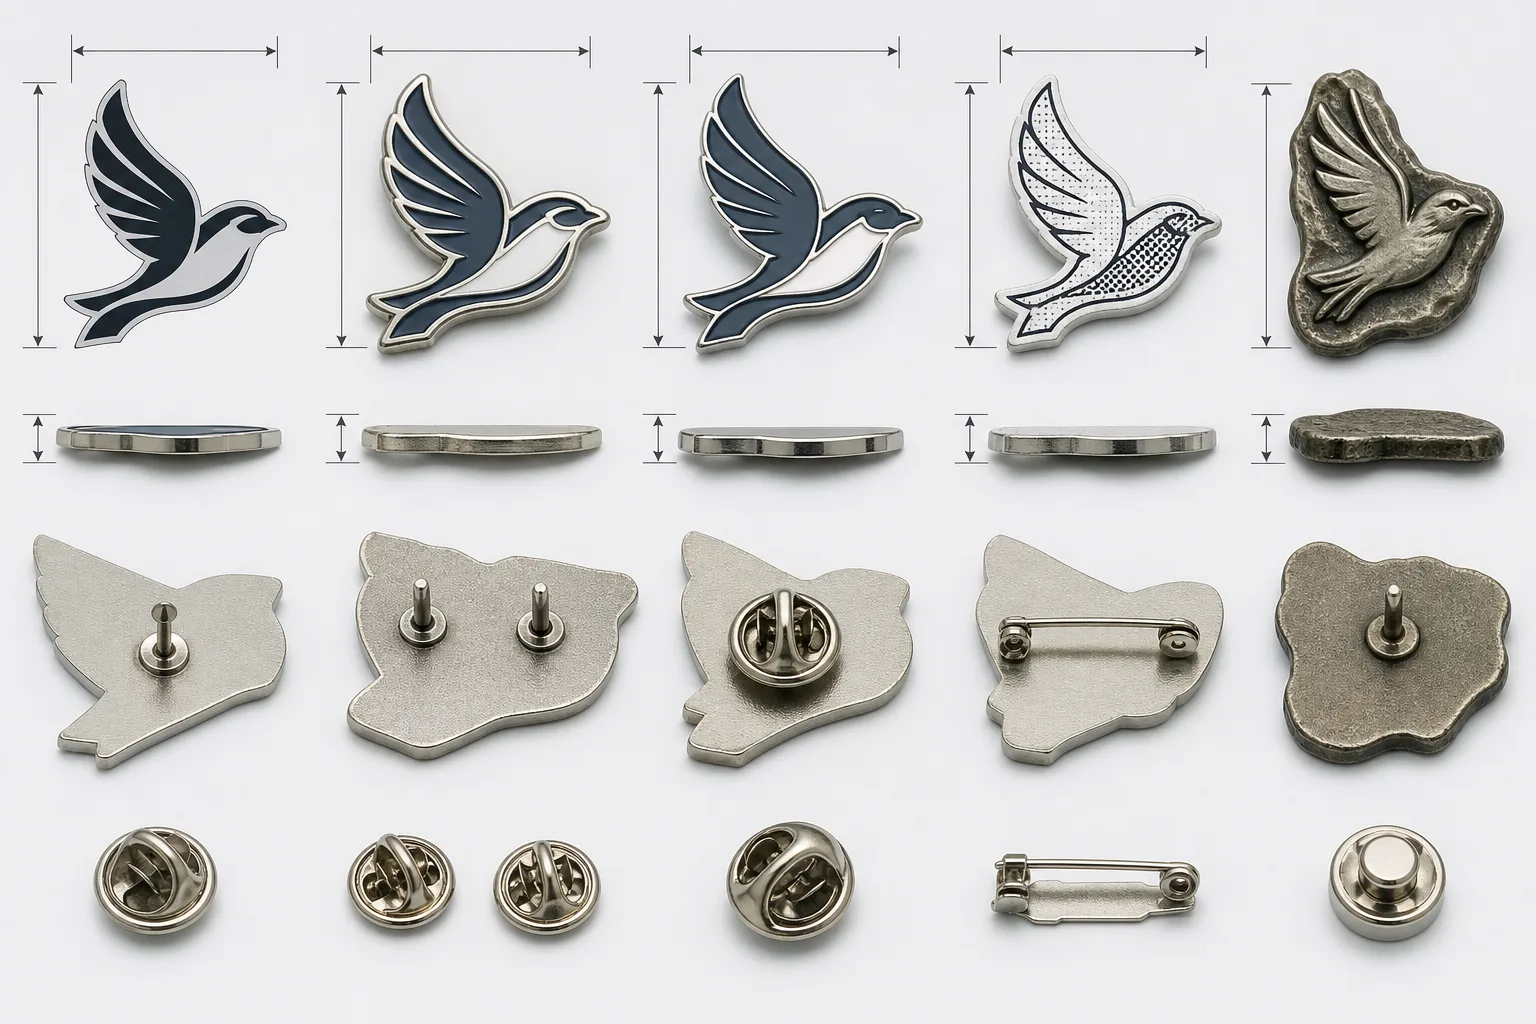
Plan Custom Pin Weight From Finished Construction, Not Size Alone
Custom pin weight depends on more than the largest dimension. Relevant variables include outline area, base thickness, material or grade, relief, recessed fields, cutouts, holes, rear posts, clutches, and layered or multi-part construction.
An early geometry-based estimate is different from finished weight. An irregular enamel pin with open areas, recesses, and assembled attachments cannot be represented reliably by treating it as one solid shape. Request the outline or diameter, thickness direction, material direction, relief plan, open areas, attachment count, and layered components.
Use the scenario thickness directions as design context: corporate logo badges are listed at 1.2–2 mm, uniform badges at 1.5–2.5 mm, fashion enamel pins at 1.5–3 mm, and official badges at 1.8–3 mm. These values belong to their specific applications and should not be merged into a general rule.
Gairun lists zinc alloy, brass, iron, stainless steel, and aluminum among the metals it can process for custom products. Material selection is considered with geometry, forming method, relief, decoration, and intended use. Avoid labeling a selected weight as lightweight, comfortable, or suitable for a garment without a defined validation method.
Tooling defines shape, dimensions, thickness, and relief. After trial forming, Gairun compares the first article with the approved 1:1 drawing for dimensions, thickness, and relief detail. Project tolerances should be specified separately. If finished weight affects packing, garment interaction, or distribution planning, request a buyer-specific drawing or sample.
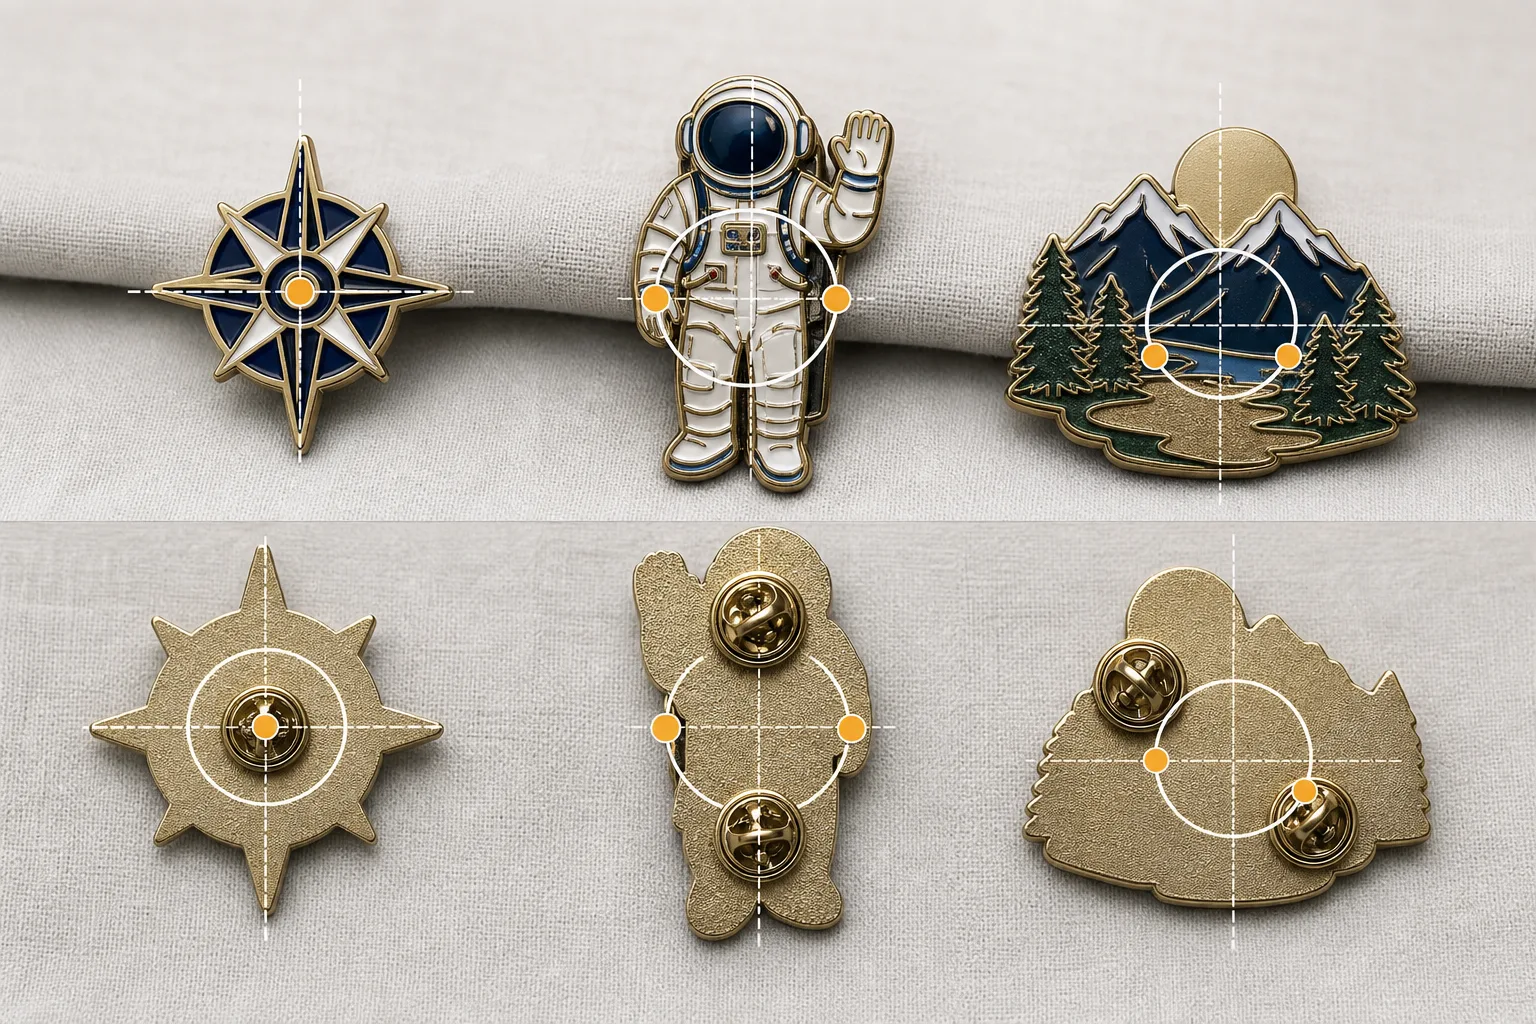
Set Pin Post Placement Around the Worn Center of Gravity
Map the features that can shift the finished center of gravity: thick relief, wide upper sections, long extensions, off-center silhouettes, layered components, and open areas. Then specify post count and relative position from defined edges or centerlines.
For a compact, broadly balanced form, begin with one post in a stable central zone. For a larger, elongated, or materially off-center form, begin with two separated attachment points to resist twisting around one connection. For fashion or collectible pins, double posts can be an initial direction above approximately 35–40 mm or when the center of gravity is offset. This is not a universal threshold.
Uniform badges require a comparison between fabric thickness, badge weight, orientation, and backing. Double-pin butterfly clutches, screw posts, and magnetic backs may each suit different conditions. Magnetic backs require attention to contact area, magnet structure, fabric thickness, rotation, and sliding. Do not assume a universal holding force.
Relevant attachment options include butterfly clutches, rubber clutches, tie-tack style attachments, screw posts, brooch pins, safety pins, and magnetic backs. For children’s badges, lockable pins or sew-on structures are contextual directions instead of small detachable clutches or magnets. Age group, sharp-point exposure, detachable components, and destination-market requirements must be addressed.
For uniform applications, Gairun’s scenario guidance connects fabric thickness and badge weight with double-pin, screw, or magnetic attachment selection. Stability, fabric pull, and backing retention should be tested on the intended garment. A post layout can reduce rotation, but only validation can show whether it works for the finished assembly.
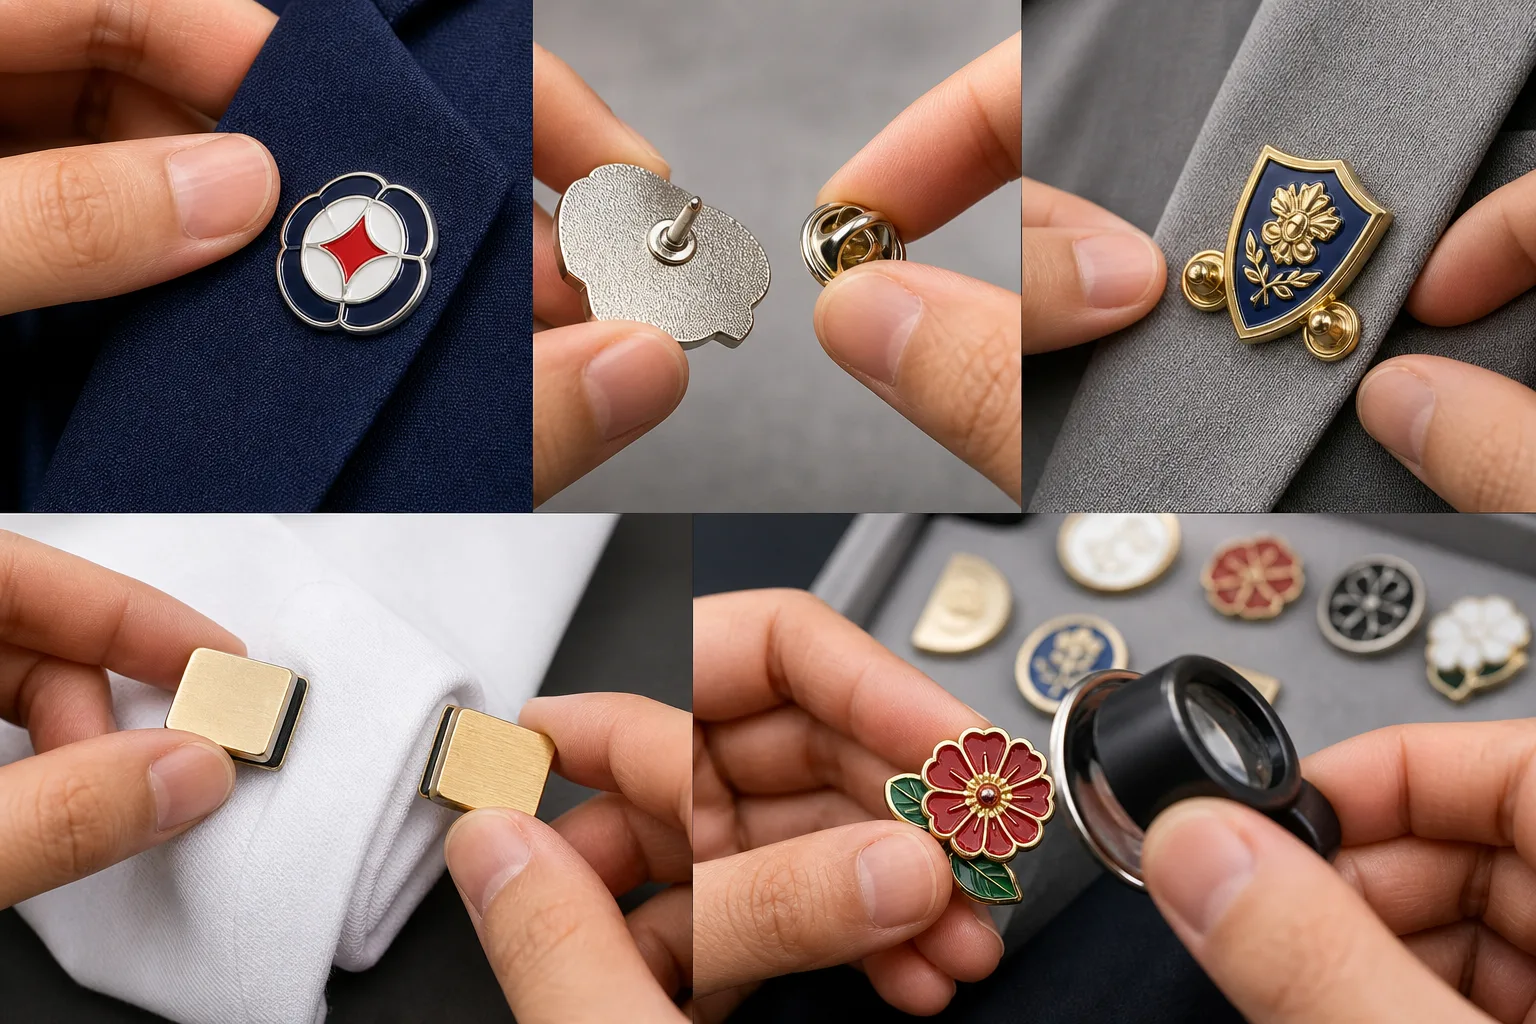
Validate Wearability, Attachment, and Safety Before Bulk Production
Test the approved orientation and backing on the intended fabric or garment thickness. Check stability, rotation, sliding, fabric pull, backing retention, sharp edges, point protection, and closure. For magnetic designs, assess the selected arrangement and contact area across relevant fabric thicknesses.
For children’s products, assess the age group, detachable-component restrictions, small-parts risk, point protection, and closure. Any warning or regulatory statement should be matched to the destination market and intended users. Magnetic products also require consideration of user and market warnings where applicable.
Compare color placement with the approved proof. Gairun describes checks for color overflow and areas with insufficient color. This is a process control, not a defect-free guarantee. The proof should show the intended metal borders, color fields, finish direction, and attachment positions.
A custom sample is useful when the buyer needs to assess the proposed artwork and construction. Sample approval and authorization for bulk production remain separate steps. A stock sample can demonstrate general workmanship, finish, construction, or packaging, but it does not prove the buyer’s custom design; availability and delivery cost must be confirmed.
Gairun’s service path moves from requirement intake through artwork and engineering review, sample planning when selected, production coordination, packaging, and shipment preparation. Buyer approvals remain distinct control points. The practical limitation is simple: scenario dimensions and post-placement directions guide the first decision, while final performance depends on the approved construction and intended wear conditions.
Submit an Enamel Pin Specification for Proof and Engineering Review
A useful RFQ should state the product type, quantity, dimensions, artwork, design variants, finish, color treatment, attachments, packaging, destination, and required schedule. Add material, forming, shipping, or trade-term preferences when known. Unresolved technical choices can be marked for assessment.
- Front definition: largest overall dimension, width and height where needed, worn orientation, front and rear views, and acceptable silhouette.
- Construction: base thickness direction, relief hierarchy, cutouts, exposed-metal borders, material direction, finish, and decoration method.
- Attachment: post count, post positions from centerlines or edges, backing type, intended fabric, and the rotation or droop concern to evaluate.
- Artwork: vector file, usable PDF, or concept sketch, plus wording, color references, front and back instructions, and variant details.
- Packaging: backing card and protective bag for collectibles, or individual bags, accessory boxes, or presentation packaging for uniforms and institutional badges.
- Approvals: separate artwork acceptance, sample approval, and bulk-production authorization.
Gairun states that a 2D or 3D artwork proof may be provided within 24 hours when sufficient project information is available. Reconfirm current timing; a proof does not replace confirmation of dimensions, structure, finish, or order terms. Custom sampling is stated as normally 7–10 working days, subject to confirmation for the actual design, and is not a guaranteed delivered date.
Under an OEM arrangement, production follows a buyer-supplied design or specification. OEM does not remove the need for engineering review or buyer approval. A 50-piece trial order may be supported for selected products after design, process, and project review; it is not a universal minimum order or guaranteed option. To begin the discussion, use Gairun’s Request a Quote form.
Frequently Asked Questions
What enamel pin size should I choose for a corporate lapel logo?
A corporate logo badge may begin at 18–30 mm maximum dimension with a 1.2–2 mm base thickness as scenario guidance. Confirm logo detail, fabric, attachment, weight, and packaging before finalizing.
When should an enamel pin use two posts instead of one?
Two separated posts are an initial direction for elongated, top-heavy, larger, or off-center designs. The actual post positions depend on finished geometry, relief, backing, fabric, and wear testing.
How can I estimate custom pin weight before making a sample?
Provide the outline, dimensions, thickness direction, material direction, relief, cutouts, open areas, attachment count, and layers. These inputs support an early estimate, but assembled finished weight may require a drawing or sample.
Does a larger lapel pin always need a thicker base?
No. Size, outline area, material, relief, cutouts, attachment components, and intended wear all matter. A larger pin may require a different structure or post layout rather than simply a thicker base.
Can small text, narrow gaps, and gradients be reproduced on a small enamel pin?
They require an actual-size artwork check. The result may call for simplification, a larger pin, screen printing, UV printing, or another construction direction. Do not assume reproduction without proof approval.
What should be included in a pin post placement specification?
State post count, positions from defined edges or centerlines, worn orientation, backing type, intended fabric thickness, finished-weight concern, and whether rotation, sliding, or droop must be evaluated.